Warning! Professional sew-ers look away. The last sewing class I had was umpteen years ago in junior high and then what I've picked up here and there from my mother-in-law and excellent sew-er friend Elizabeth. I was very pleased with how these valances turned out and wanted to give instructions that anyone could follow to make similar valances or curtains for their windows. No experience necessary, I promise. If you can sew a reasonably straight line, you can make cute curtains in less than a couple hours!
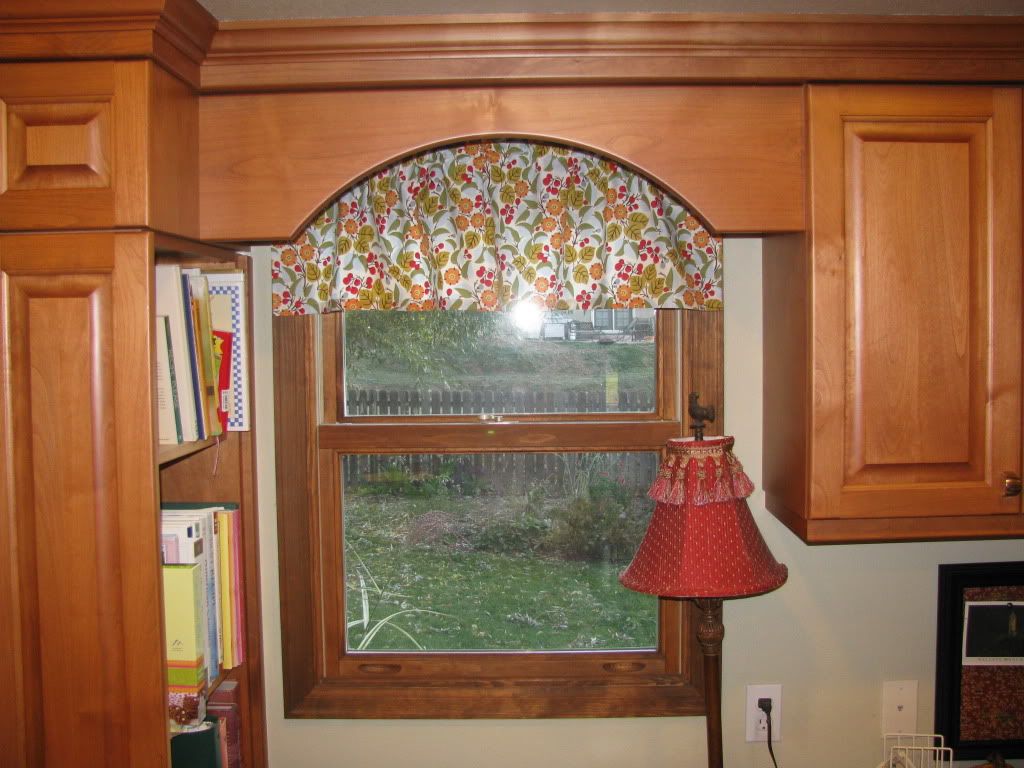
I was dog tired boss, of my boring brownish plaid valances. I couldn't find what I liked in stores and settled on the brown plaid 5+ years ago when we redid our kitchen. This summer it hit me that I couldn't even see out into our beautiful backyard because the valance came down so low. I thought, "d'uh why am I not making them? I know how to do this!"
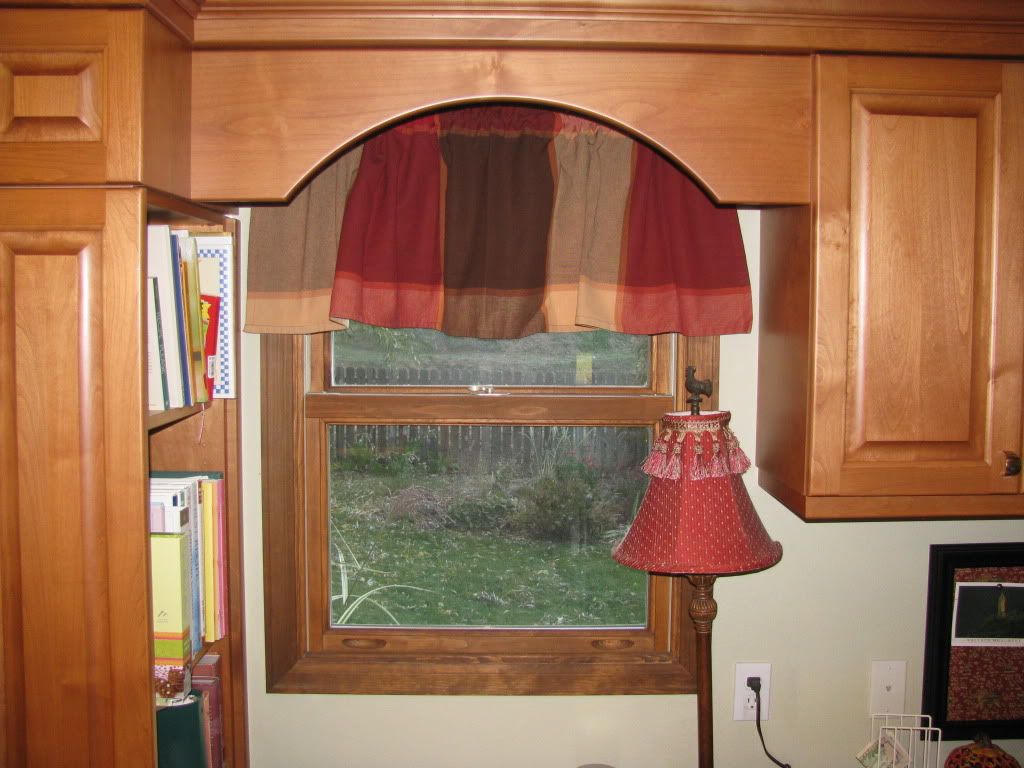
Before:
The fun part is going to the fabric store and choosing fabric. You'll need to know how much to have cut. Measure your windows across, adding at least 1 in for side hems. Depending on how full you want the material to gather, you should multiply that number by 1.5 or 2. Usually the thinner the material (think sheers), the more you want it to gather. By the way, this rule applies when you purchase curtains too (look at me, giving you rules already! But that one I learned from my mother-in-law and whatever she says goes.) Add all the window widths together if you are doing multiple windows and divide by 36 to get # of yards.
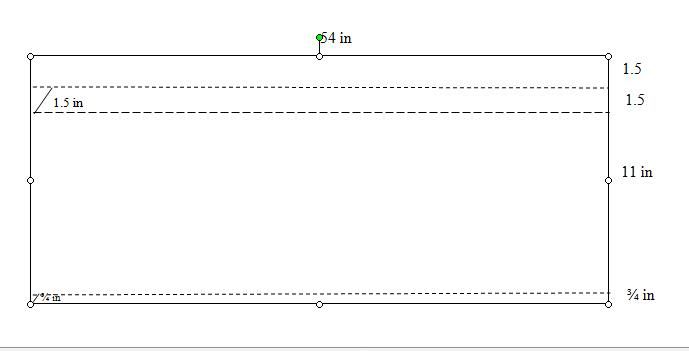
In a separate calculation decide how long you want the valance (or curtains) to be. Then we need to add in the header (the material above the rod pocket), the rod pocket, the back of both the header and rod pocket, and the turn-under of the top (no raw edges showing makes a huge difference in the finished product!) and finally the bottom hem and hem turn-under. Note, if you make the header and the rod pocket the same length you'll be glad you did later. All of those measurements are subjective to your rods, windows and personal taste somewhat but you can take a look at your current curtains until you get a feel for it. One thing I would say is ALWAYS turn-under the same amount as the hem and rod pocket on the top and bottom. Once the curtains are up and the sun is coming through the window, you will see any differences and it won't look as nice. The diagram below shows my measurements for one of the windows. The diagonal slashes on the drawing are turn-unders. Most fabrics are 45 in wide on the bolt. Knowing the total length you need, can you get two panels from 45 in? If so, you'll need 1/2 as many yards as you calculated in the paragraph above. For instance, mine is 1.5+1.5+1.5+1.5+1.5+11+3/4+3/4=20 so I could get two panels from one bolt width of 45 in material. Make sense?
Also, when you're shopping, look at the information on the end of the bolt to make sure the material is machine washable and use your coupons. If you have a change of heart on fabric choice, some stores will graciously let you return cut fabric. Crazy. I’ve never done it but I know people who have. I’m looking at you E.
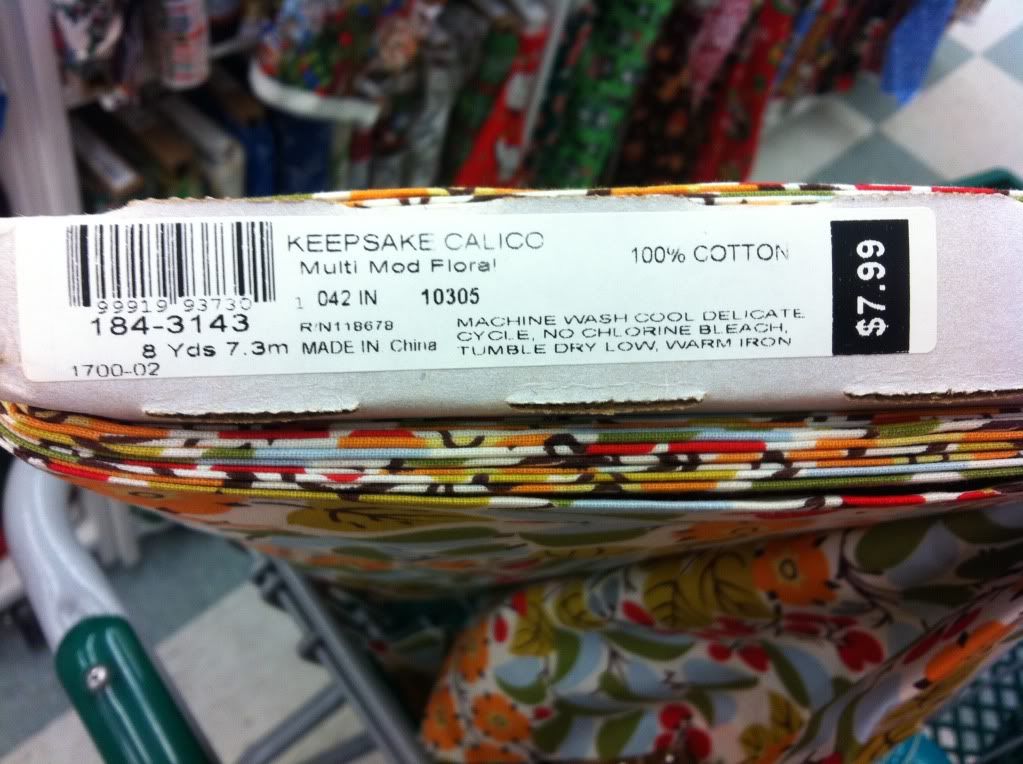
When cutting your fabric, pay close attention to right side and top side up. It's very easy to get mixed up and have your vines growing down instead of up. I use a mat board and rotary cutter and was done cutting in less than 10 minutes.
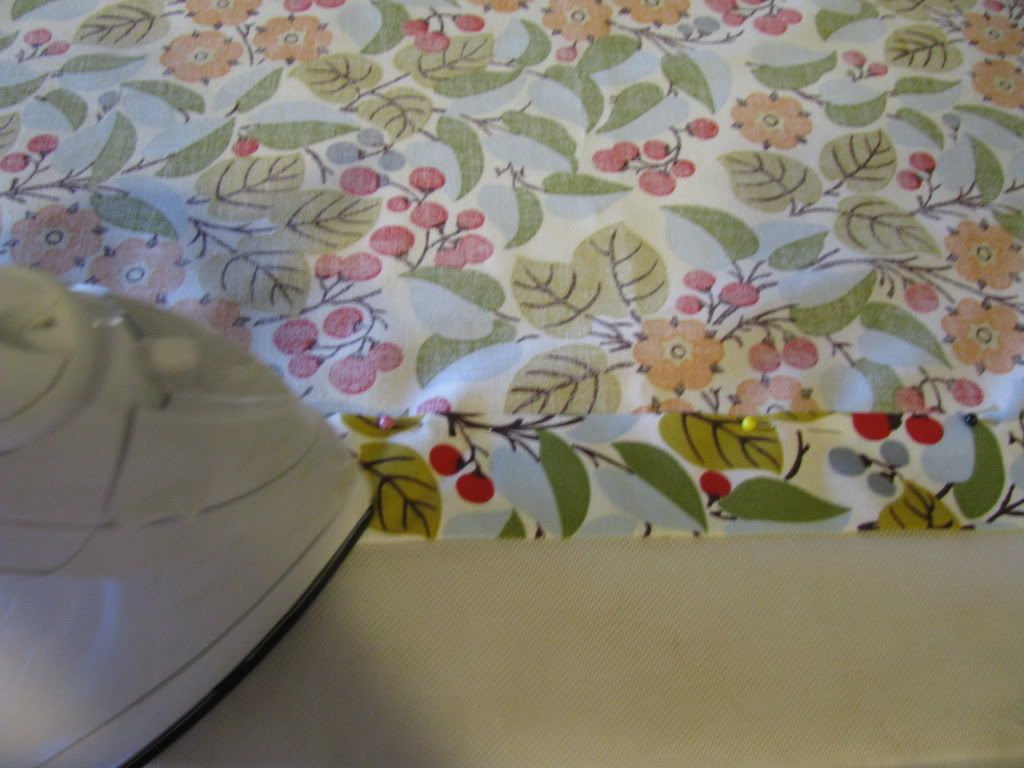
Time to get sewing...I mean pinning and pressing. I spend more time pinning and pressing than I do actually sewing. I grab myself a diet Coke, put my feet up, get reacquainted with some Nate Berkus or Jersey Shore
Sew all the side hems getting as close as possible to the inside fold edge as you can.
Back to more pinning and pressing and Nate and Snooky... pin the bottom hem turn-under(s) (in my case 3/4 in). Pin the top turn-under(s) for the rod pocket (1.5 in for my valance). Press both and take out pins. Fold the bottom hem(s) up again (3/4 in for me) and pin. Fold the top again, this time the total inches for the rod pocket(s) and header(s) (for my valance 3 in) and pin. Press the hem and top. Sew the hem and top.
Finally, remember when I said you'd be glad if you made the header and rod pocket the same length in the 4th paragraph, here's where that pays off: fold the top edge once again to the seam line of the rod pocket you just sewed and press, no need to pin (it doesn’t take much to make me happy). Unfold and sew a straight line from side to side in the fold line you just pressed (my machine practically sews itself in the ditch) to create the finished rod pocket and header. Press and hang.
You're done! Way to go! If you want to put up a sign saying you made the curtains, I condone it.
After: Aren't they cheery?
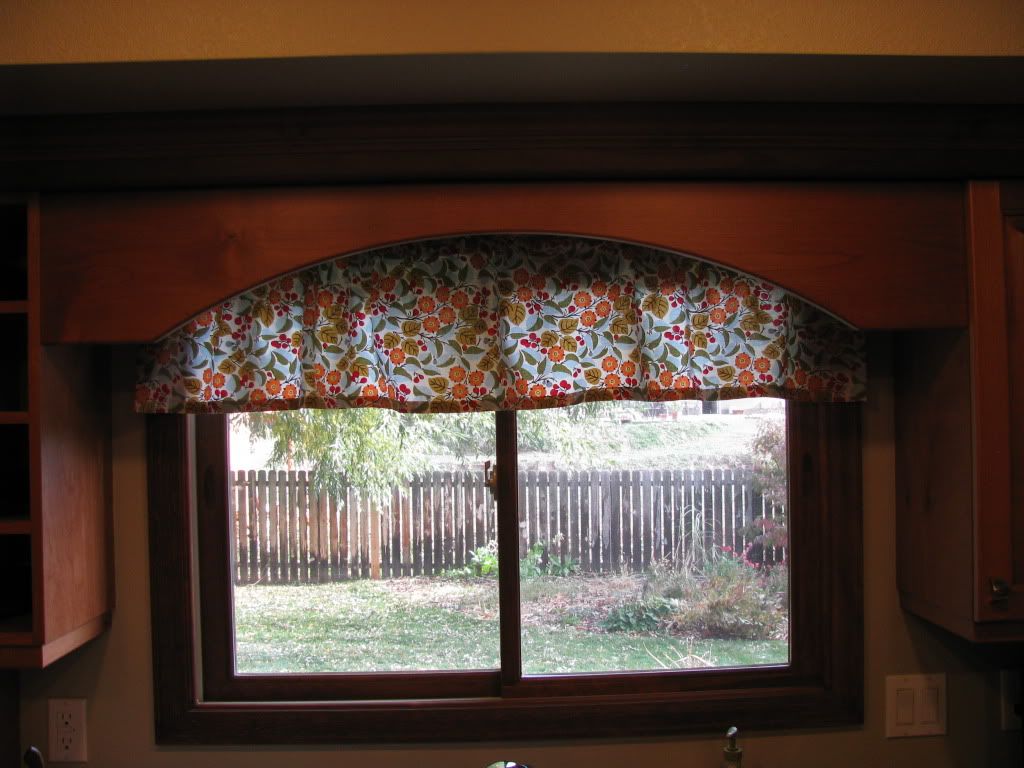
Just wait until next spring/summer when I show you the backyard in all its glory. I'm afraid the Autumn and new puppy had their way with the view before I finished the valances. Darn it.
3 comments:
Thought you did a great job on valence and also your web page!!
Thank you so much for giving everyone remarkably terrific opportunity to read critical reviews from this web site. It really is so excellent and also packed with amusement for me personally and my office fellow workers to visit the blog a minimum of thrice every week to see the newest issues you have. Not to mention, I'm just at all times satisfied considering the mind-boggling guidelines served by you. Certain 2 facts in this article are easily the finest I have ever had. kids blackout curtains
My husband was diagnosed with Creutzfeldt-Jakob Disease (CJD) four years ago. For over two years, we relied on prescription medications and therapies, but unfortunately, his symptoms continued to worsen. His memory,coordination, and overall strength declined, and everyday life became increasingly difficult.Last year, out of desperation and hope, we decided to try an herbal treatment program from NaturePath Herbal Clinic. Honestly, we were skeptical at first, but within a few months of starting the treatment, we began to notice real changes. His alertness improved, his movements became steadier, and he regained a surprising amount of energy and clarity.
Incredibly, he also regained much of his independence and confidence. It’s been a life-changing experience he feels more like himself again, better than he had in years.If you or a loved one is struggling with CJD, I truly recommend looking into their natural approach. You can visit their website at [www.naturepathherbalclinic.com]
info@naturepathherbalclinic.com
Post a Comment